Self-install guide
Up and running
this afternoon.
Ten clear steps. No engineers. Two small plug-and-play devices, a free account, and a quiet hour with this page — and your property starts running itself.
Time required
~ 2 hrs
From the moment you open the hub box.
Skills required
None
If you can set up a wi-fi router, you can do this.
Cost
$0
Free during beta · no card required.
Step 01
Set up Home Assistant.
- Follow the official Home Assistant installation guide that comes with your hub. Most owners use the Home Assistant Green — plug it in next to your router, give it five minutes.
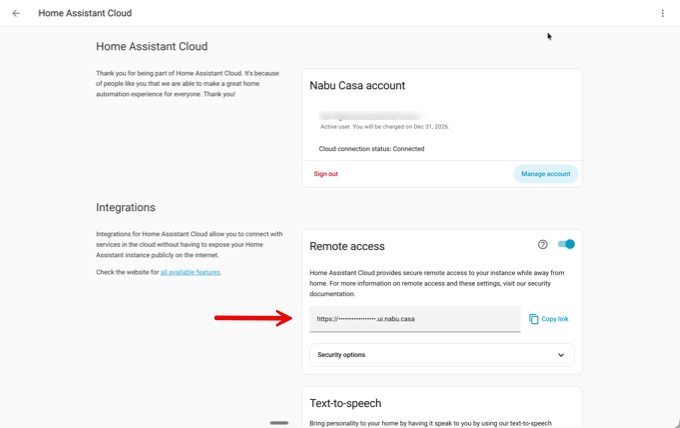
- In Settings → Home Assistant Cloud, confirm your Nabu Casa subscription is active and that you can see your unique remote access URL. You'll paste this URL into RentalHelm in Step 3.
Step 02
Add your devices in Home Assistant.
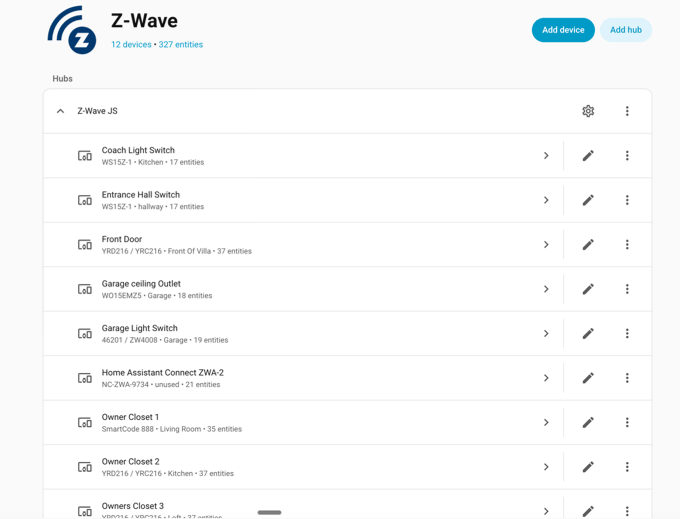
- In Settings → Devices → Z-Wave, pair each of your Z-Wave devices: door locks, pool thermostats, anything else.
- Wi-Fi devices (smart thermostats, plugs, doorbells) are added manually on the same Devices page before moving on.
Step 03
Connect RentalHelm to Home Assistant.
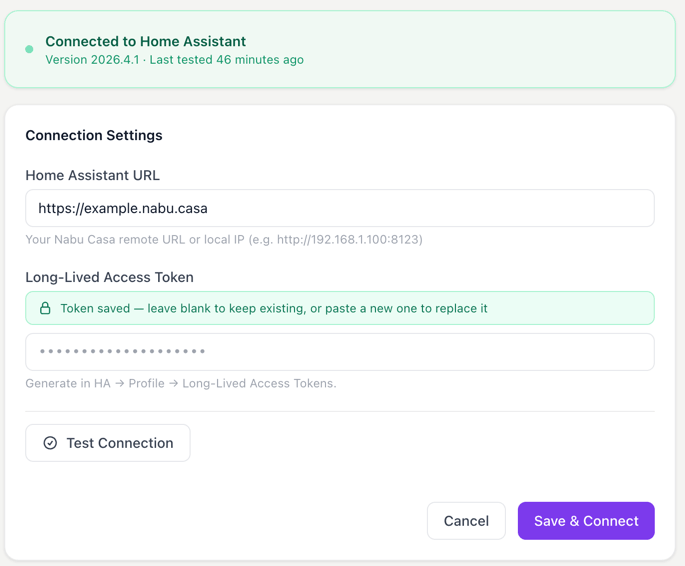
- Log in at rentalhelm.com, add your property, then open Integrations → Home Assistant and paste your Nabu Casa remote URL.
- To generate a Long-Lived Access Token in Home Assistant: tap your name (bottom left) → Security tab → scroll to Long-lived access tokens → Create Token → name it "RentalHelm" → copy & paste into RentalHelm → click Save & Connect.
- You'll see a green "connected" banner with your detected HA version.
Step 04
Add your devices in RentalHelm.
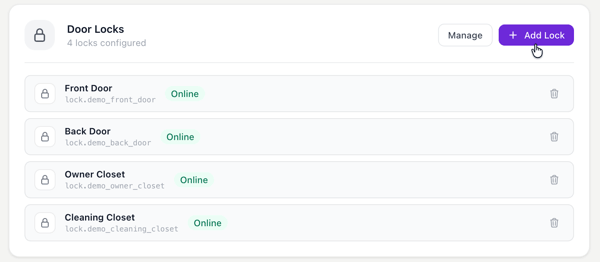
- Open Integrations → Add Lock to add each of your Z-Wave smart locks. You can add as many as you have.
- Under Thermostats & Climate, add your pool heater and indoor AC thermostats.
- Skip the PMS section for now — we'll handle that in Step 8.
Step 05
Set up access control.
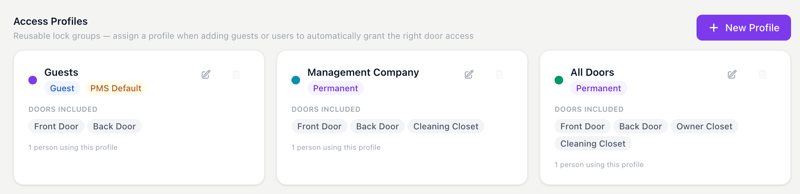
- Open Access Control → New Profile.
- Access Profiles group your locks and assign them to different types of people — guests, property managers, owners, cleaners.
Example — a property with 4 locks
Owner AccessAll four locks
Property ManagerFront Door · Pool Bathroom · Janitor Closet
GuestsFront Door · Pool Bathroom
- Enable "Default for PMS-synced bookings" on the profile to be used for guest codes — this lets RentalHelm program guest codes automatically.
Step 06
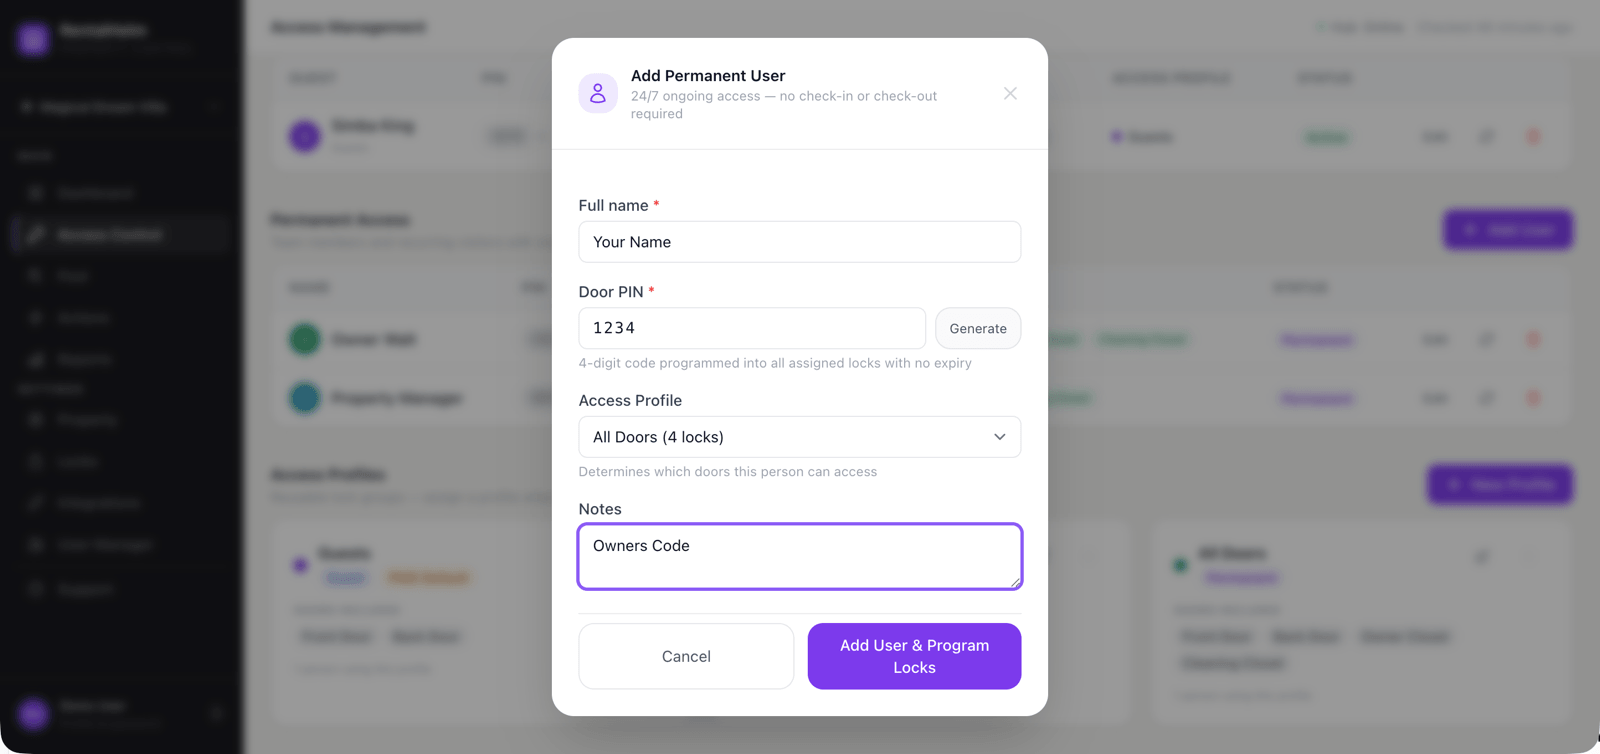
Add permanent users.
- Under Permanent Access → Add User, register your owners, property managers, and cleaners with their codes and any required check-in/out times.
- Under Guests, add guests manually with check-in and check-out dates if you don't use a supported PMS.
Step 07
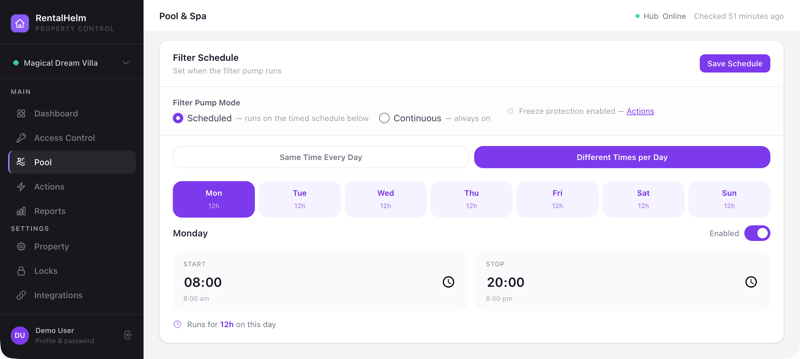
Set up pool controls.
- Open Pool → Filter Schedule and set your filter pump's preferred start & end times. Use the same hours every day, or set different hours per day, or run continuously.
- From the same page, control pool heating and set your pool & spa target temperatures.
Step 08
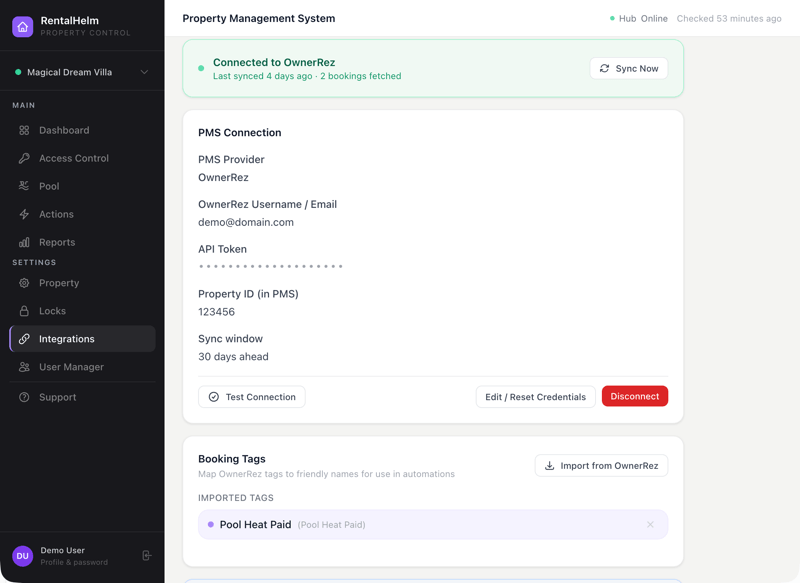
Connect your PMS. (optional)
- Once everything above is in place, open Integrations → Property Management System and connect OwnerRez, Hostaway, Ciirus or Lodgix. Run more than one side-by-side if you list the same property on multiple PMSs.
- This enables automatic guest code programming straight from your bookings.
Step 09
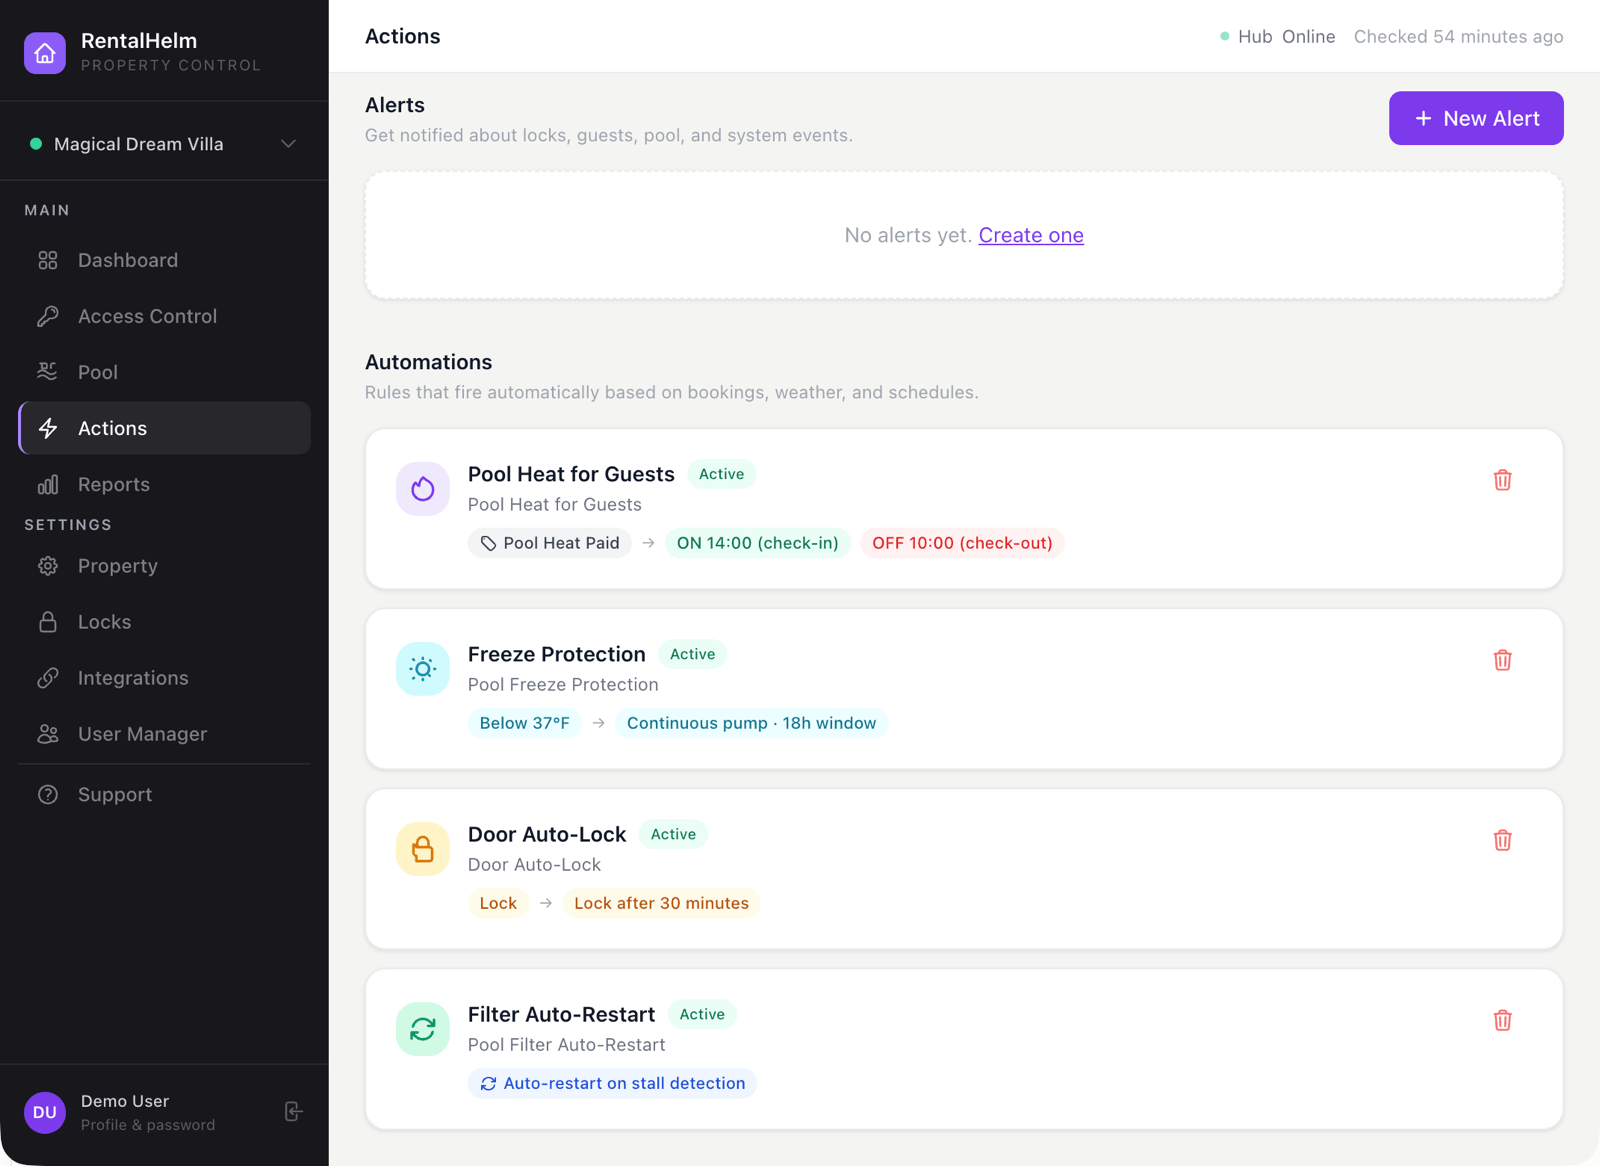
Set up automations & alerts.
- Open Actions to build automations and email notifications.
- Recommended: enable example templates like automatic pool heat for guests who paid for it (requires PMS tags such as
pool_heaton the booking). - Set up low-battery email alerts for each lock at a threshold of your choosing.
Step 10
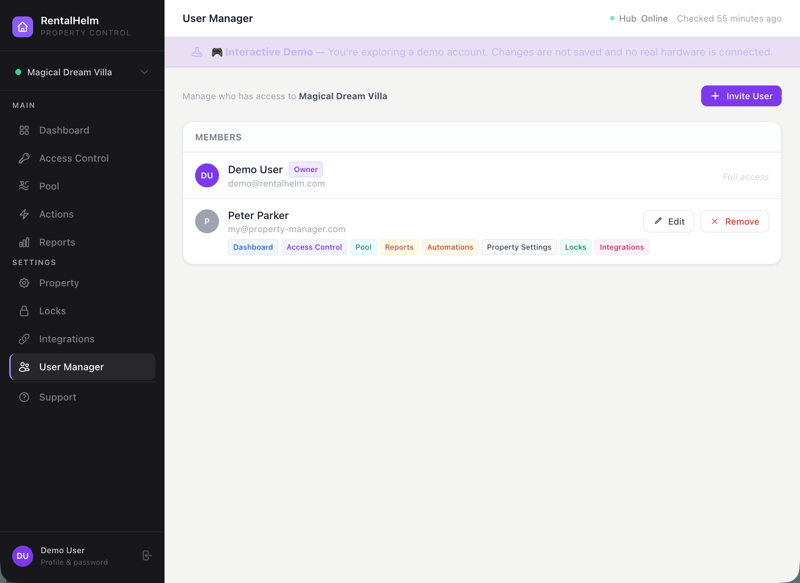
Invite your team.
- Open User Manager and invite a co-host, family member, or property manager by email. Each invitation expires after 24 hours and grants only the permissions you tick.
Sounds like a lot?
Have us do the rigging — from $299.
Our team will set up the full property end-to-end. Hardware configuration, Z-Wave pairing, lock profiles, pool controls, PMS onboarding. Hardware must be purchased separately, beforehand.